| .github/workflows | ||
| accounts | ||
| admin | ||
| appsettings | ||
| computes | ||
| conf | ||
| console | ||
| datasource | ||
| dev | ||
| doc | ||
| instances | ||
| interfaces | ||
| locale | ||
| logs | ||
| networks | ||
| nwfilters | ||
| static | ||
| storages | ||
| templates | ||
| virtsecrets | ||
| vrtManager | ||
| webvirtcloud | ||
| .dockerignore | ||
| .gitignore | ||
| .gitpod.yml | ||
| .travis.yml | ||
| _config.yml | ||
| Dockerfile | ||
| gunicorn.conf.py | ||
| install.sh | ||
| manage.py | ||
| README.md | ||
| Vagrantfile | ||
| webvirtcloud.sh | ||
WebVirtCloud
Python 3.x & Django 3.2 LTS
Features
- QEMU/KVM Hypervisor Management
- QEMU/KVM Instance Management - Create, Delete, Update
- Hypervisor & Instance web based stats
- Manage Multiple QEMU/KVM Hypervisor
- Manage Hypervisor Datastore pools
- Manage Hypervisor Networks
- Instance Console Access with Browsers
- Libvirt API based web management UI
- User Based Authorization and Authentication
- User can add SSH public key to root in Instance (Tested only Ubuntu)
- User can change root password in Instance (Tested only Ubuntu)
- Supports cloud-init datasource interface
Warning!!!
How to update gstfsd daemon on hypervisor:
wget -O - https://bit.ly/2NAaWXG | sudo tee -a /usr/local/bin/gstfsd
sudo service supervisor restart
Description
WebVirtCloud is a virtualization web interface for admins and users. It can delegate Virtual Machine's to users. A noVNC viewer presents a full graphical console to the guest domain. KVM is currently the only hypervisor supported.
Quick Install with Installer (Beta)
Install an OS and run specified commands. Installer supported OSes: Ubuntu 18.04/20.04, Debian 10/11, Centos/OEL/RHEL 8. It can be installed on a virtual machine, physical host or on a KVM host.
wget https://raw.githubusercontent.com/retspen/webvirtcloud/master/install.sh
chmod 744 install.sh
# run with sudo or root user
./install.sh
Manual Installation
Generate secret key
You should generate SECRET_KEY after cloning repository. Then put it into webvirtcloud/settings.py.
import random, string
haystack = string.ascii_letters + string.digits + string.punctuation
print(''.join([random.SystemRandom().choice(haystack) for _ in range(50)]))
Install WebVirtCloud panel (Ubuntu 18.04+ LTS)
sudo apt-get -y install git virtualenv python3-virtualenv python3-dev python3-lxml libvirt-dev zlib1g-dev libxslt1-dev nginx supervisor libsasl2-modules gcc pkg-config python3-guestfs libsasl2-dev libldap2-dev libssl-dev
git clone https://github.com/retspen/webvirtcloud
cd webvirtcloud
cp webvirtcloud/settings.py.template webvirtcloud/settings.py
# now put secret key to webvirtcloud/settings.py
sudo cp conf/supervisor/webvirtcloud.conf /etc/supervisor/conf.d
sudo cp conf/nginx/webvirtcloud.conf /etc/nginx/conf.d
cd ..
sudo mv webvirtcloud /srv
sudo chown -R www-data:www-data /srv/webvirtcloud
cd /srv/webvirtcloud
virtualenv -p python3 venv
source venv/bin/activate
pip install -r conf/requirements.txt
python3 manage.py migrate
python3 manage.py collectstatic --noinput
sudo chown -R www-data:www-data /srv/webvirtcloud
sudo rm /etc/nginx/sites-enabled/default
Restart services for running WebVirtCloud:
sudo service nginx restart
sudo service supervisor restart
Setup libvirt and KVM on server
wget -O - https://bit.ly/36baWUu | sudo sh
Done!!
Go to http://serverip and you should see the login screen.
Install WebVirtCloud panel (CentOS8/OEL8)
sudo yum -y install epel-release
sudo yum -y install python3-virtualenv python3-devel libvirt-devel glibc gcc nginx supervisor python3-lxml git python3-libguestfs iproute-tc cyrus-sasl-md5 python3-libguestfs libsasl2-dev libldap2-dev libssl-dev
Creating directories and cloning repository
sudo mkdir /srv && cd /srv
sudo git clone https://github.com/retspen/webvirtcloud && cd webvirtcloud
cp webvirtcloud/settings.py.template webvirtcloud/settings.py
# now put secret key to webvirtcloud/settings.py
# create secret key manually or use that command
sudo sed -r "s/SECRET_KEY = ''/SECRET_KEY = '"`python3 /srv/webvirtcloud/conf/runit/secret_generator.py`"'/" -i /srv/webvirtcloud/webvirtcloud/settings.py
Start installation webvirtcloud
virtualenv-3 venv
source venv/bin/activate
pip3 install -r conf/requirements.txt
cp conf/nginx/webvirtcloud.conf /etc/nginx/conf.d/
python3 manage.py migrate
python3 manage.py collectstatic --noinput
Configure the supervisor for CentOS
Add the following after the [include] line (after files = ... actually):
sudo vim /etc/supervisord.conf

[program:webvirtcloud]
command=/srv/webvirtcloud/venv/bin/gunicorn webvirtcloud.wsgi:application -c /srv/webvirtcloud/gunicorn.conf.py
directory=/srv/webvirtcloud
user=nginx
autostart=true
autorestart=true
redirect_stderr=true

[program:novncd]
command=/srv/webvirtcloud/venv/bin/python3 /srv/webvirtcloud/console/novncd
directory=/srv/webvirtcloud
user=nginx
autostart=true
autorestart=true
redirect_stderr=true
Edit the nginx.conf file
You will need to edit the main nginx.conf file as the one that comes from the rpm's will not work. Comment the following lines:
#    server {
#        listen       80 default_server;
#        listen       [::]:80 default_server;
#        server_name  _;
#        root         /usr/share/nginx/html;
#
#        # Load configuration files for the default server block.
#        include /etc/nginx/default.d/*.conf;
#
#        location / {
#        }
#
#        error_page 404 /404.html;
#            location = /40x.html {
#        }
#
#        error_page 500 502 503 504 /50x.html;
#            location = /50x.html {
#        }
#    }
}
Also make sure file in /etc/nginx/conf.d/webvirtcloud.conf has the proper paths:
upstream gunicorn_server {
    #server unix:/srv/webvirtcloud/venv/wvcloud.socket fail_timeout=0;
    server 127.0.0.1:8000 fail_timeout=0;
}
server {
    listen 80;

    server_name servername.domain.com;
    access_log /var/log/nginx/webvirtcloud-access_log;

    location /static/ {
        root /srv/webvirtcloud;
        expires max;
    }

    location / {
        proxy_pass http://gunicorn_server;
        proxy_set_header X-Real-IP $remote_addr;
        proxy_set_header X-Forwarded-for $proxy_add_x_forwarded_for;
        proxy_set_header Host $host:$server_port;
        proxy_set_header X-Forwarded-Proto $remote_addr;
        proxy_connect_timeout 1800;
        proxy_read_timeout 1800;
        proxy_send_timeout 1800;
        client_max_body_size 1024M;
    }
}
Change permissions so nginx can read the webvirtcloud folder:
sudo chown -R nginx:nginx /srv/webvirtcloud
Change permission for selinux:
sudo semanage fcontext -a -t httpd_sys_content_t "/srv/webvirtcloud(/.*)"
sudo setsebool -P httpd_can_network_connect on -P
Add required user to the kvm group(if you not install with root):
sudo usermod -G kvm -a <username>
Allow http ports on firewall:
sudo firewall-cmd --add-service=http
sudo firewall-cmd --add-service=http --permanent
sudo firewall-cmd --add-port=6080/tcp
sudo firewall-cmd --add-port=6080/tcp --permanent
Let's restart nginx and the supervisord services:
sudo systemctl restart nginx && systemctl restart supervisord
And finally, check everything is running:
sudo supervisorctl status
gstfsd             RUNNING   pid 24662, uptime 6:01:40
novncd             RUNNING   pid 24661, uptime 6:01:40
webvirtcloud       RUNNING   pid 24660, uptime 6:01:40
Apache mod_wsgi configuration
WSGIDaemonProcess webvirtcloud threads=2 maximum-requests=1000 display-name=webvirtcloud
WSGIScriptAlias / /srv/webvirtcloud/webvirtcloud/wsgi_custom.py
Install final required packages for libvirtd and others on Host Server
wget -O - https://clck.ru/9V9fH | sudo sh
Done!!
Go to http://serverip and you should see the login screen.
Alternative running novncd via runit(Debian)
Alternative to running nonvcd via supervisor is runit.
On Debian systems install runit and configure novncd service:
apt install runit runit-systemd
mkdir /etc/service/novncd/
ln -s /srv/webvirtcloud/conf/runit/novncd.sh /etc/service/novncd/run
systemctl start runit.service
Default credentials
login: admin
password: admin
Configuring Compute SSH connection
This is a short example of configuring cloud and compute side of the ssh connection.
On the webvirtcloud machine you need to generate ssh keys and optionally disable StrictHostKeyChecking.
chown www-data -R ~www-data
sudo -u www-data ssh-keygen
cat > ~www-data/.ssh/config << EOF
Host *
StrictHostKeyChecking no
EOF
chown www-data -R ~www-data/.ssh/config
You need to put cloud public key into authorized keys on the compute node. Simpliest way of doing this is to use ssh tool from the webvirtcloud server.
sudo -u www-data ssh-copy-id root@compute1
Host SMBIOS information is not available
If you see warning
Unsupported configuration: Host SMBIOS information is not available
Then you need to install dmidecode package on your host using your package manager and restart libvirt daemon.
Debian/Ubuntu like:
sudo apt-get install dmidecode
sudo service libvirt-bin restart
Arch Linux
sudo pacman -S dmidecode
systemctl restart libvirtd
Cloud-init
Currently supports only root ssh authorized keys and hostname. Example configuration of the cloud-init client follows.
datasource:
  OpenStack:
      metadata_urls: [ "http://webvirtcloud.domain.com/datasource" ]
Reverse-Proxy
Edit WS_PUBLIC_PORT at settings.py file to expose redirect to 80 or 443. Default: 6080
WS_PUBLIC_PORT = 80
How To Update
# Go to Installation Directory
cd /srv/webvirtcloud
source venv/bin/activate
git pull
pip3 install -U -r conf/requirements.txt
python3 manage.py migrate
python3 manage.py collectstatic --noinput
sudo service supervisor restart
Running tests
Server on which tests will be performed must have libvirt up and running.
It must not contain vms.
It must have default storage which not contain any disk images.
It must have default network which must be on.
Setup venv
python -m venv venv
source venv/bin/activate
pip install -r conf/requirements.txt
Run tests
python manage.py test
LDAP Configuration
The example settings are based on an OpenLDAP server with groups defined as "cn" of class "groupOfUniqueNames"
Enable LDAP
sudo sed -i "s/LDAP_ENABLED = False/LDAP_ENABLED = True/g"" /srv/webvirtcloud/webvirtcloud/settings.py
Set the LDAP server name and root DN
sudo sed -i "s/LDAP_URL = ''/LDAP_URL = 'myldap.server.com'/g"" /srv/webvirtcloud/webvirtcloud/settings.py
sudo sed -i "s/LDAP_ROOT_DN = ''/LDAP_ROOT_DN = 'dc=server,dc=com'/g"" /srv/webvirtcloud/webvirtcloud/settings.py
Set the passphrase to decrypt the password
sudo sed -i "s/pass:MYPASSPHRASE/pass:MYTRUEPASSPHRASE/g" /srv/webvirtcloud/webvirtcloud/.dec_ldap_pwd.sh
Encrypt the password
echo MYPASSWORD | openssl enc -pbkdf2 -salt -pass pass:MYTRUEPASSPHRASE | base64
Set the user that has browse access to LDAP and its password encrypted
sudo sed -i "s/LDAP_MASTER_DN = ''/LDAP_MASTER_DN = 'cn=admin,ou=users,dc=kendar,dc=org'/g"" /srv/webvirtcloud/webvirtcloud/settings.py
sudo sed -i "s/LDAP_MASTER_PW_ENC = ''/LDAP_MASTER_PW_ENC = 'MYPASSWORDENCRYPTED'/g"" /srv/webvirtcloud/webvirtcloud/settings.py
Set the attribute that will be used to find the username, i usually use the cn
sudo sed -i "s/LDAP_USER_UID_PREFIX = ''/LDAP_USER_UID_PREFIX = 'cn'/g"" /srv/webvirtcloud/webvirtcloud/settings.py
You can now create the filters to retrieve the users for the various group. This will be used during the user creation only
sudo sed -i "s/LDAP_SEARCH_GROUP_FILTER_ADMINS = ''/LDAP_SEARCH_GROUP_FILTER_ADMINS = 'memberOf=cn=admins,dc=kendar,dc=org'/g"" /srv/webvirtcloud/webvirtcloud/settings.py
sudo sed -i "s/LDAP_SEARCH_GROUP_FILTER_STAFF = ''/LDAP_SEARCH_GROUP_FILTER_STAFF = 'memberOf=cn=staff,dc=kendar,dc=org'/g"" /srv/webvirtcloud/webvirtcloud/settings.py
sudo sed -i "s/LDAP_SEARCH_GROUP_FILTER_USERS = ''/LDAP_SEARCH_GROUP_FILTER_USERS = 'memberOf=cn=users,dc=kendar,dc=org'/g"" /srv/webvirtcloud/webvirtcloud/settings.py
Now when you login with an LDAP user it will be assigned the rights defined. The user will be authenticated then with ldap and authorized through the WebVirtCloud permissions.
If you'd like to move a user from ldap to WebVirtCloud, just change its password from the UI and (eventually) remove from the group in ldap
REST API / BETA
Webvirtcloud provides a REST API for programmatic access. To access API methods open your browser and check them with Swagger interface
http://<webvirtloud-address:port>/swagger
http://<webvirtloud-address:port>/redoc
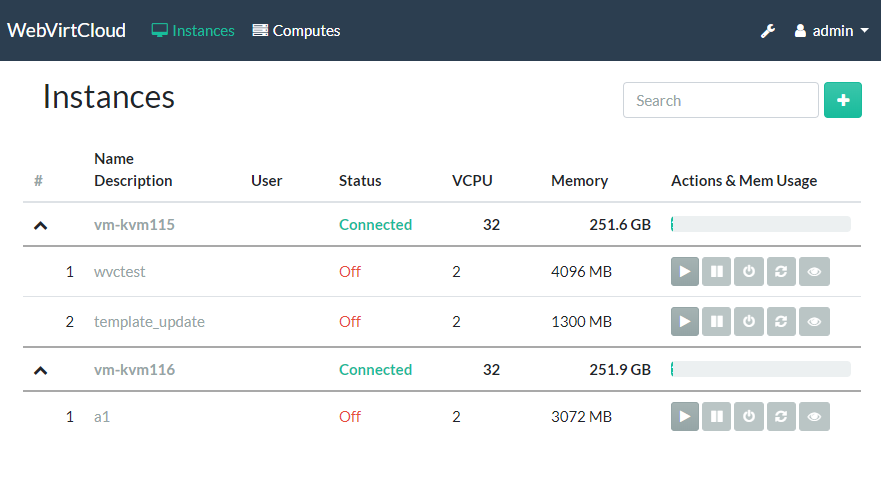
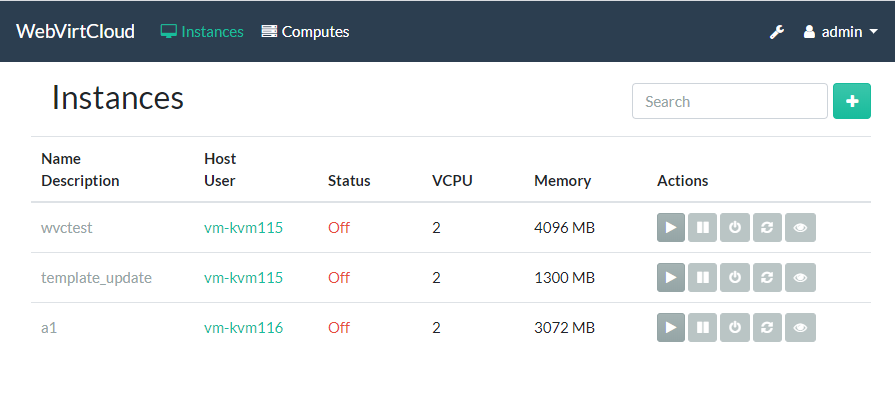
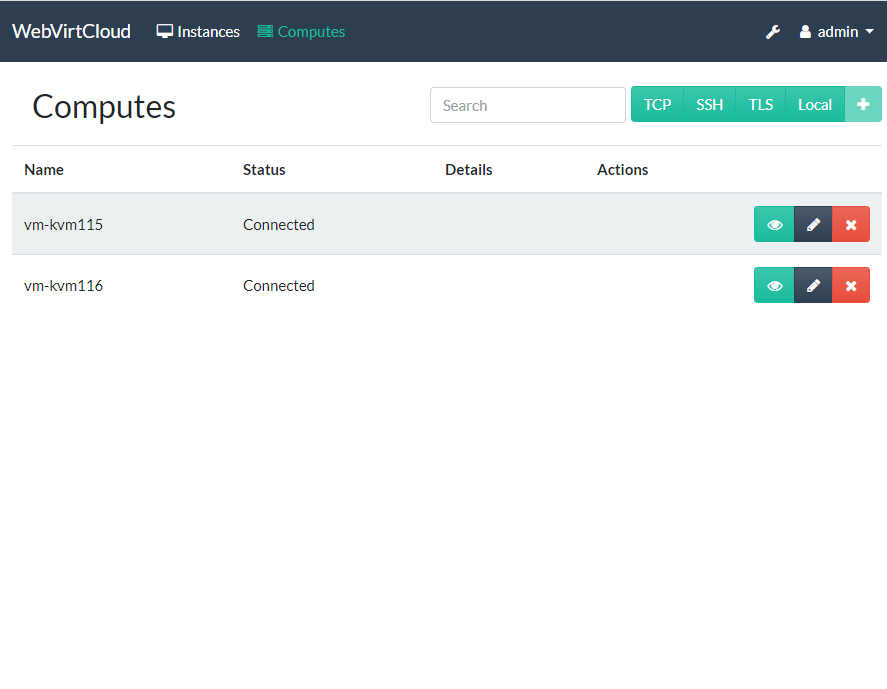
Screenshots
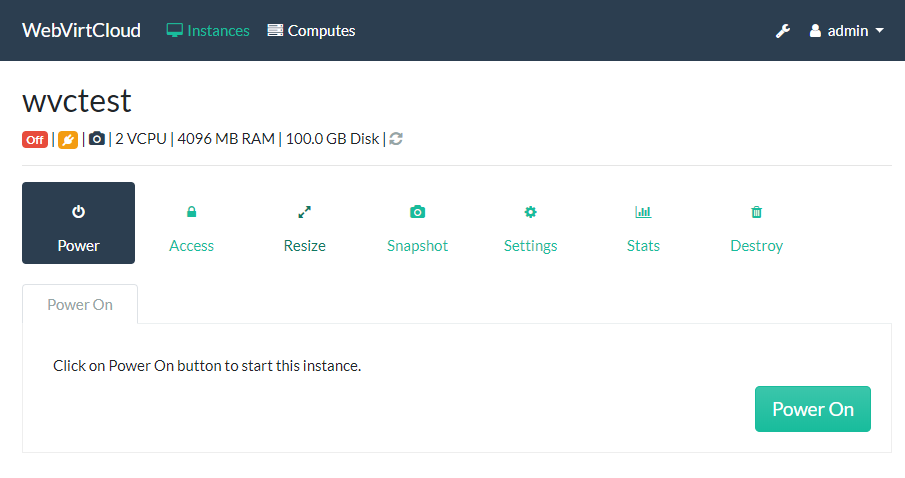
Instance Detail:
License
WebVirtCloud is licensed under the Apache Licence, Version 2.0.

